Basics Of Growing Potatoes in Containers
Basics of Growing Potatoes in Containers:
You’ll get much better results if you use certified seed potatoes. Most plants require 65 to 100 days to mature completely. Potatoes come in hundreds of varieties, so look forward to different shapes, flavors and slightly differing lengths of growing time.
There are at least 2 methods for cutting seed potatoes; cutting as you plant or cutting ahead and allowing the cut surface to callous over. Each piece should be about 1 ½ to 2 ounces with at least 2 eyes per piece. Whole seed potatoes can be planted if they are small.
Because potatoes prefer a rich loamy soil with a pH of about 6.0 you must prepare the soil. Check the soil and measure the N-P-K levels if you aren’t sure about the fertility. Check the plant at mid-season. Add extra fertilizer if the leaves are slightly yellow or if the plants are not growing well.
Make sure that the soil has reached a minimum of 45 degrees Fahrenheit before planting your seed potatoes. Planting too early in cold, wet soil can ruin your crop.
All tubers need regular irrigation. Consistent watering, keeping the soil damp but not soggy, will keep your vegetables happy and healthy. The amount of rainfall in your area will affect the need to water. On average, about 1 inch of rain per week is optima l. Use a rain gage near your container garden to monitor rainfall. Over watering will result in rotting tubers. Under watering will result in lower potato yield. Potatoes do not like long hours of hot, direct sunlight day after day. If you live in an area with very hot summers, you may want to partially shade your plants.
Healthy soil and consistent watering will help control pests and diseases. Learn to differentiate between the good, helpful insects in your garden and the pests. Pests such as the potato leafhopper and the Colorado potato beetle can be removed by hand. Remember to look at the undersides of your leaves. Observation and removal is the key to pest control.
Growing Potatoes in the Fabric Containers (Bags)
Prepare: Cut seed potatoes into chunks having at least 2 eyes each. Allow the pieces to dry and callous over, about 2 days.
Fill the Smart Pot container about 1/3 full with a 50/50 mixture of garden soil and compost.
Plant: Plant one seed potato for each 3 gallons of Smart Pot container. For the #15 container, for example, plant 5 seed potatoes. For the #10 container, plant 3 or 4 seed potatoes. Place the seed potatoes evenly in the container.
Water the soil thoroughly. It should be moist but not soggy.
Care: Soon, you will see little stems pop through the soil. Mound up more soil/compost mix, but do not to cover the leaves. The leaves need sun and air exposure.
As the potatoes continue growing, continue adding soil/compost mix until you reach the top of the Smart Pot container.
As summer ends and autumn nears, the potato leaves and stems will begin to turn yellow. Timing will vary somewhat depending on the potato variety and your temperature zone.
When the foliage has died back and the weather is cooler, stop all watering about 2 weeks prior to harvest. The leaves and stems will turn almost completely yellow. You are ready to harvest.
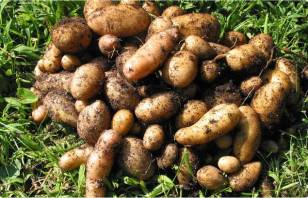
Harvest: Don’t use a spade or sharp instrument! Pull out all the stems and leaves, wearing gloves. Dig in and find your hidden potatoes.
Store: Arrange potatoes in a single row for a day and allow to dry. Then brush off the soil. Store potatoes in a cool, dry area with good ventilation. Do not store potatoes in the refrigerator!
Bag Care: The Smart Pot Container is reusable! Shake out any extra soil and allow the container to dry. Store in a dry location until you are ready to start again next spring.
May I plant potatoes in Smart Pots in late summer in the southern US?
I went on vacation. My substitute gardener watered, but did not mound. Plant was a foot high on return…Any downside to mounding when the plant is tall?
Hi Jen,
Based off our experience, we don’t see any downsides to mound at this height. You’ll want to very carefully mound, trying not to break any of the branches. Due to the height of your plant, we recommend to mound only 4-5” of soil, not much more.
I don’t think so. As I understand it mounding serves two purposes. One, it keeps the potatoes from being exposed to the sun. This is important because of they are exposed to the sun they will start to turn green and build up solanine, which is a toxin. Two, if you are growing an indeterminate variety the plant will continue to send out roots in to the mounded up area and will result in more potatoes.
Can brass or galvanized pots be used?
You can place the Smart Pot in other containers, including brass or galvanized pots. You want to make sure you have ample space between the two pots, at least 1-2” gap. This will allow air to flow through and allow the roots to air prune. Thanks for your question!
Hi, we are new to Veg growing we are growing potatoes in tubs at the moment, my question is after this year’s potato harvest can we use the same soil and compost mixture for next years crop ?
The best time to plant potatoes in South Carolina is around February 1 – March 31 in the Coastal region and March 15-April 20 in the Piedmont, when the soil temperature is 45-50°F.
Potatoes are popular during the cold season because of their many uses. Just as potato production is booming in South Africa’s Eastern Cape, gardeners in South Carolina are also taking the opportunity to plant them, despite the region’s reputation as a hot state.